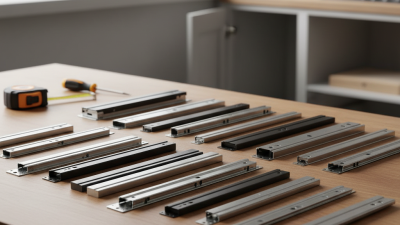
Choosing Top Mount Drawer Slides in 2026 requires more than comparing prices or advertised load ratings. These slides sit beneath a drawer, supporting daily movement while remaining mostly hidden from view. A suitable choice depends on cabinet depth, drawer-box clearance, opening width, and the weight of stored items. Measure twice. A small error can create rubbing, uneven gaps, or a drawer that refuses to close.
Current designs increasingly combine soft-close action, corrosion-resistant finishes, and smoother ball-bearing systems. Yet these features are not equally valuable for every project. A kitchen drawer holding cast-iron cookware needs stronger support than a bedroom drawer holding scarves. Check the manufacturer’s dynamic load rating, not only its maximum marketing figure. Review installation diagrams, screw requirements, adjustment range, and cycle-test information when available. Reliable suppliers should provide clear specifications and consistent after-sales support.
Practical experience also matters. During installation, a slide may appear correct until the drawer carries its real load. That is when weak alignment becomes obvious. I would test the drawer empty, then loaded, while listening for scraping or clicking. Some recommendations may change after this check, and that is worth admitting. Product claims can sound precise, but cabinet materials, humidity, and installation skill affect performance. This guide examines how to choose Top Mount Drawer Slides with a balanced view of durability, fit, safety, maintenance, and long-term value. The best option is not always the most expensive one.
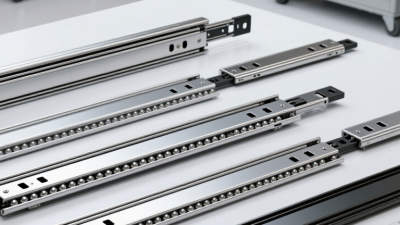
Top mount drawer slides are hardware systems installed high on the drawer or cabinet opening. Unlike bottom-mounted guides, they support movement from an upper position. Each slide uses rollers, ball bearings, or a similar guided mechanism. When you pull the drawer, the inner rail travels along the outer rail. The bearings reduce friction and help keep the box aligned.
The term “top mount” is not fully standardized. Check the manufacturer’s mounting diagram before measuring. In practical cabinet work, I measure the drawer width, opening width, side clearance, and closed depth twice. A small error can cause rubbing or uneven gaps.
Choose the slide length according to the cabinet depth, not the drawer front. Check the rated load as well. A file drawer needs stronger support than a bedside drawer.
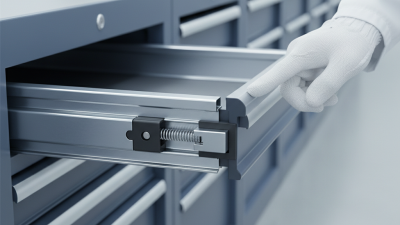
Look for full-extension travel when you need access to the rear. Soft-close action can reduce noise, but it may require more force near closure. Locking features help prevent the drawer from shifting during use. Steel construction usually offers better durability, while lighter materials may suit small drawers. I would also test one installed pair before fitting every drawer. Real wood movement, imperfect cabinet walls, and uneven screw placement can change performance. That test often reveals problems the specification sheet misses.
Choosing a drawer slide in 2026 starts with cabinet conditions, not a catalog label. Top mount slides suit projects with limited side clearance and an accessible mounting surface near the drawer’s upper edge. Measure the opening twice. A 1 mm error can cause binding. Check the load rating against real use, including cookware, tools, or pantry jars. Soft-close action helps, but it cannot correct a twisted cabinet.
Side-mount slides work well in standard face-frame cabinets and heavier drawers. They need paired side gaps, often about 12.5 mm per side, so verify the specification carefully. Undermount slides create a cleaner appearance and hide the hardware. However, they require accurate bottom notches and a square drawer box. Center-mount slides suit narrow, light-duty drawers. They offer less lateral stability under heavy loads. Top mount remains useful for compact repairs and unusual layouts, although adjustment access may be awkward.
I once chose a top mount slide for a shallow utility drawer because the clearance looked generous. The drawer still rubbed at full extension. The cabinet floor was slightly uneven. That mistake taught me to test the opening with a temporary spacer and a loaded drawer. Use a steel rule, not guesswork. Choose full extension when rear access matters. Choose partial extension when cabinet depth is limited. In kitchens or humid rooms, review corrosion resistance before installation.
How to Choose Top Mount Drawer Slides in 2026?
How to Measure Drawer and Cabinet Dimensions Correctly
Accurate measurements are the foundation of a smooth top mount drawer slide installation. Measure the cabinet opening at the front, middle, and back. Older cabinets are rarely perfectly square. Record the smallest width, not the largest one.
Measure the drawer box from outside edge to outside edge. Then check its depth from the front face to the rear panel. Do not include handles, decorative fronts, or protruding screws. Measure the cabinet’s usable depth as well. The selected slide should fit inside this space without forcing the drawer against the back panel. Required side or top clearance depends on the slide design, so confirm the technical drawing before ordering.
I once measured only the cabinet front and missed a narrow section near the hinges. It caused unnecessary rework. Measure twice. Check again.
Tips: Use a steel tape and a small square for reliable readings. Write every measurement in millimeters or inches, never both casually. Test the drawer opening with a temporary spacer before drilling. Leave enough room for smooth movement, but avoid excessive gaps that make the drawer wobble. If the cabinet is slightly uneven, correct the mounting surface first. A perfect slide cannot compensate for a twisted cabinet.
Measure the cabinet opening first, then calculate the drawer box width using a total side clearance of 25.4 mm (12.7 mm per side). Choose a slide length that does not exceed the usable cabinet depth.
The examples use common metric opening widths and standard slide lengths. Drawer box width is calculated as cabinet opening width minus 25.4 mm total clearance. Before installation, confirm the actual slide specifications, drawer construction, rear clearance, and cabinet depth.
Choosing top mount drawer slides starts with the real load, not the advertised number. Weigh the empty drawer, then add tools, cookware, or stored hardware. A drawer rated for 45 kilograms may perform poorly when overloaded repeatedly. In my workshop checks, uneven loading caused more trouble than total weight. Place heavy items near the center. Check the cabinet material and mounting surface, too.
Extension changes daily convenience. Three-quarter extension leaves the rear section hidden, while full extension exposes nearly the entire drawer. Over-travel can improve access, but it may increase stress on the front mounting points.
Pull the drawer slowly and inspect its movement. It should glide without scraping, tipping, or sudden resistance. Small alignment errors become obvious here.
Durability depends on more than steel thickness. Examine the finish, bearing movement, stop design, and screw-hole quality. A slide used several times daily needs a stronger cycle rating than one used occasionally. Clean installation matters. I once blamed a slide for rough movement, but the cabinet opening was slightly narrow. That mistake changed my checking process. Measure both sides, keep the slides parallel, and test the drawer before final tightening. Some specifications still lack clear testing conditions, so compare stated capacity, extension type, and cycle information together. Be cautious with perfect claims. Real furniture is rarely perfect.
Choosing top mount drawer slides in 2026 requires more than checking load capacity. Measure the cabinet opening, drawer width, and available clearance carefully. Top mount slides need a level mounting surface and consistent spacing on both sides. A small measuring error can cause rubbing or uneven movement. I usually mark screw positions with a pencil before drilling. This simple step prevents hurried corrections.
During installation, use screws suited to the cabinet material. Keep the slide parallel with the drawer front and cabinet frame. Tighten each screw firmly, but do not crush soft wood. Install both slides at the same height. Then open and close the drawer several times by hand. It should move smoothly without scraping, lifting, or stopping. Test it with a gradual load, not a sudden heavy object. Check alignment again after loading. I once trusted a level surface that was slightly twisted, and the drawer exposed the mistake immediately.
Maintenance is practical and easy. Remove dust from the tracks with a dry cloth every few months. Inspect screws for loosening and replace damaged hardware promptly. Avoid excessive lubricant, because it can collect grit inside the slide. Listen for clicking or uneven travel. These sounds often appear before visible damage. Keep the drawer below its rated capacity, especially in humid rooms where wood can expand. Recheck the installation after seasonal changes. Even careful work sometimes needs adjustment.
| Evaluation Dimension | Recommended Specification or Practice | Why It Matters | Installation, Testing, or Maintenance Guidance |
|---|---|---|---|
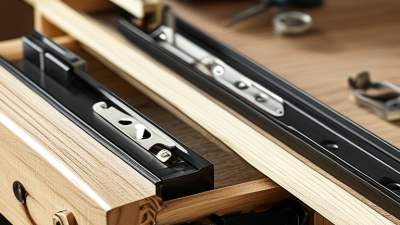
| Slide position | Top-mount slides are installed beneath the drawer or cabinet member, depending on the slide design. | The mounting position affects drawer clearance, stability, and the usable interior width. | Confirm the manufacturer’s mounting orientation before drilling. Keep both sides parallel and at the same height. |
| Drawer length | Choose a slide length that fits the cabinet depth while allowing the drawer to close fully. | An oversized slide may interfere with the cabinet back; an undersized slide reduces support and access. | Measure the usable cabinet depth from the inside front edge to the obstruction at the rear. Allow clearance for the slide mechanism. |
| Side and vertical clearance | Use the clearance specified for the selected slide; many side-mounted systems require approximately 12.7 mm per side, but top-mount systems vary. | Incorrect clearance can cause binding, excessive movement, or failure of the locking and closing features. | Measure the slide and drawer together rather than relying only on nominal dimensions. Check clearance with a feeler gauge when precision is important. |
| Load capacity | Select a rated load capacity above the drawer’s fully loaded weight. Common furniture slide ratings range from approximately 25 kg to 45 kg per pair, depending on construction and extension. | The rating determines how safely the slide can support the drawer during normal use. | Include the drawer box, hardware, and contents in the load estimate. Do not exceed the rating or use a furniture slide for industrial loads. |
| Extension type | Choose partial extension, full extension, or over-travel according to access requirements. | Full extension exposes most of the drawer contents; over-travel extends beyond the cabinet front for special applications. | Verify that the selected extension does not collide with doors, handles, adjacent drawers, or nearby equipment. |
| Material and finish | Use corrosion-resistant coated steel for general indoor furniture; consider stainless or specially protected components in humid environments. | Material and finish influence corrosion resistance, wear life, and smooth operation. | Keep the slide dry and remove abrasive dust. Inspect for chipped coating, rust, bent members, or damaged ball retainers. |
| Movement feature | Select the required feature: standard movement, soft-close, push-to-open, or a locking function. | The feature affects user comfort, noise level, safety, and the force needed to open or close the drawer. | Test the feature with the drawer empty and loaded. Do not force a soft-close mechanism if alignment is incorrect. |
| Fasteners | Use screws compatible with the slide holes and cabinet material; screw length must not penetrate the drawer or cabinet exterior. | Incorrect fasteners can loosen, split the material, or obstruct the moving parts. | Pre-drill in solid wood or particleboard where appropriate. Tighten screws evenly without deforming the slide. |
| Tools for installation | Tape measure, pencil, square, level, drill or screwdriver, suitable drill bit, and a depth stop or masking tape. | Accurate marking and controlled drilling reduce alignment errors and material damage. | Use a square to transfer the mounting line to both sides. Confirm the cabinet is level before installing the slides. |
| Mounting sequence | Install the cabinet members first, attach the drawer members, then engage the drawer and adjust the fasteners. | A consistent sequence makes it easier to keep the slides parallel and correct small alignment errors. | Use temporary clamps or spacers during marking. Install the front screws first, check movement, and then secure the remaining holes. |
| Alignment tolerance | Keep the left and right slides level, parallel, and aligned front-to-back; follow the slide’s stated tolerance where available. | Even small height or angle differences can produce rubbing, uneven gaps, or premature wear. | Measure diagonals and front gaps. If the drawer binds, loosen the screws slightly, realign, and retighten gradually. |
| Empty-drawer test | Open and close the empty drawer slowly through its complete travel. | This isolates installation problems before the drawer is subjected to working loads. | Check for scraping, clicking, uneven resistance, excessive side play, incomplete closing, and abnormal noise. |
| Loaded-drawer test | Test with the intended contents distributed across the drawer, without exceeding the rated capacity. | A loaded test reveals deflection, friction, and closing problems that may not appear when empty. | Open the drawer fully, close it several times, and inspect the mounting screws after the test. Stop if the slide bends or disengages. |
| Noise and smoothness | Movement should be consistent, without grinding, sharp clicks, or sudden changes in resistance. | Noise or roughness may indicate contamination, misalignment, damaged components, or overloading. | Clean visible debris first and verify alignment. Replace damaged slides rather than forcing or hammering them into position. |
| Cleaning interval | Inspect during routine furniture maintenance and clean whenever dust, grit, or spilled material is visible. | Contamination increases friction and can damage races, rollers, or ball-bearing components. | Wipe with a clean, lint-free cloth. Avoid flooding the slide with water or using abrasive cleaners. |
| Lubrication | Lubricate only when permitted by the slide instructions and use a light lubricant suitable for the mechanism. | Excess or incompatible lubricant can attract dust and interfere with soft-close or locking components. | Apply a small amount to the specified contact points, cycle the drawer, and wipe away excess. Do not mix lubricants. |
| Safety inspection | Inspect screws, brackets, stops, release levers, locking devices, and the drawer box at regular intervals. | Loose or damaged components can allow the drawer to drop, detach, or become unstable. | Remove the drawer before tightening or replacing hardware. Replace components showing cracks, severe corrosion, deformation, or excessive play. |
| Replacement decision | Replace the slide pair when damage, persistent binding, severe corrosion, or repeated disengagement remains after realignment. | Replacing both sides maintains balanced load distribution and consistent movement. | Match length, clearance, extension, load rating, mounting pattern, and drawer removal method before purchasing replacements. |